
You’re trying to visually bring order out of chaos! Timelines are excellent for clearly displaying project stages, history, or progress. Although there are specialized tools available, you’ll be astounded at how much you can achieve with PowerPoint if you know how to utilize its hidden gems.
Now let’s use PowerPoint to make a clean, intelligible, and interesting timeline.
How to Make a Timeline in PowerPoint: Arranging Your Story. In terms of appearance
Do you need to clearly communicate a project roadmap, business history, or a series of events? Your best friend is a timeline. It turns a collection of dates and information into a captivating visual story. And you know what? No complex, specialized software is required. The fact that your preferred PowerPoint can produce timelines with a polished appearance may surprise you. For a truly professional and custom timeline design, explore the services at creativeone.cloud today.
Let’s discuss how to incorporate your narrative into a timeline.
Why Should Your Presentation Have a Timeline?
Let’s take a quick look at the “why” before moving on to the “how”:
Clarity: It simplifies difficult event sequences.
Engagement: Pictures are much more interesting than dates listed in bullet points.
Impact: Provides a quick summary of significant achievements and advancements.
Memory: People remember visual information better.
Ready to make your chronological data shine? Let’s get started!
Method 1: The SmartArt Shortcut (Quick & Versatile)
This is PowerPoint’s built-in feature designed for visual lists, processes, and yes, timelines! It’s the fastest way to get a structured timeline on your slide.
Open a New or Existing Slide: Decide where your timeline will stay.
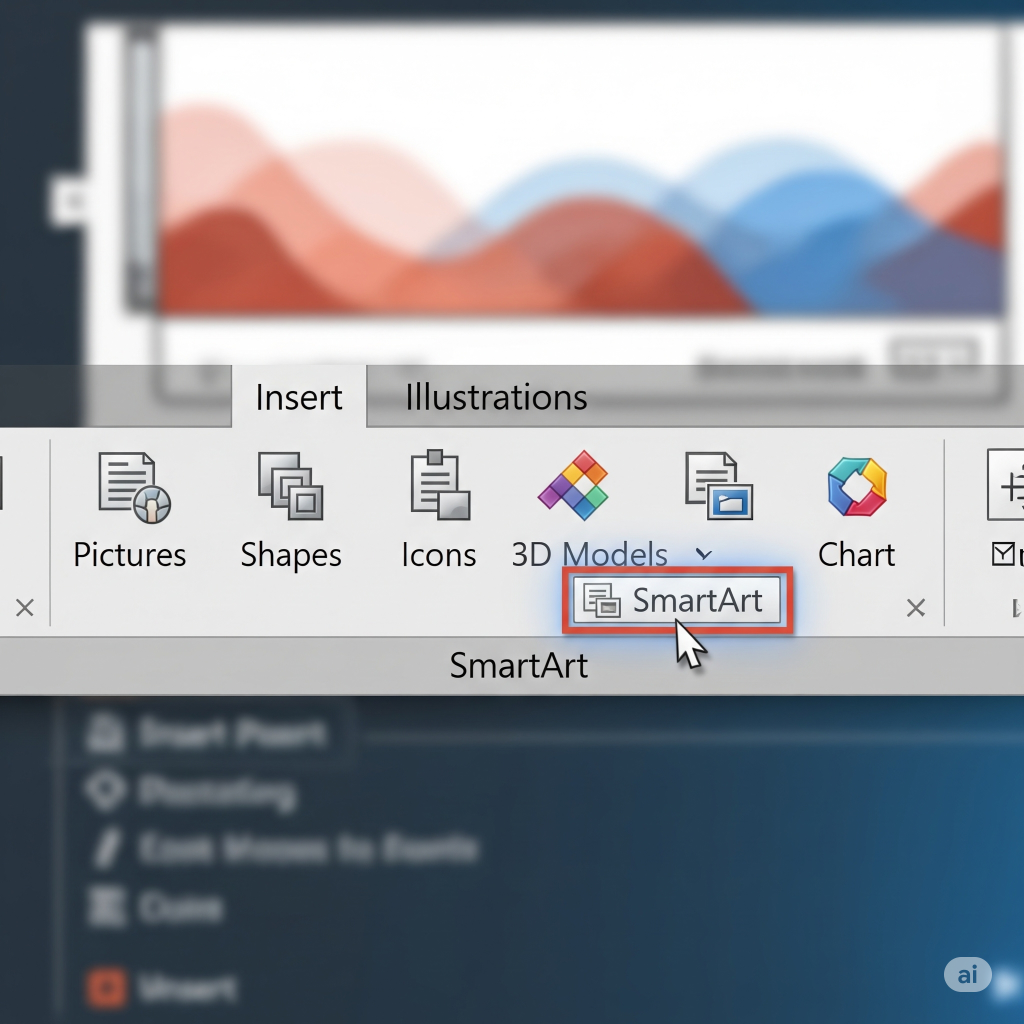
Go to the “Insert” Tab: On the PowerPoint ribbon at the top.
Click “SmartArt”: This button is usually in the “Illustrations” group.
Choose a “Process” Layout: In the “Choose a SmartArt Graphic” dialog box that appears, click on “Process” in the left-hand pane.
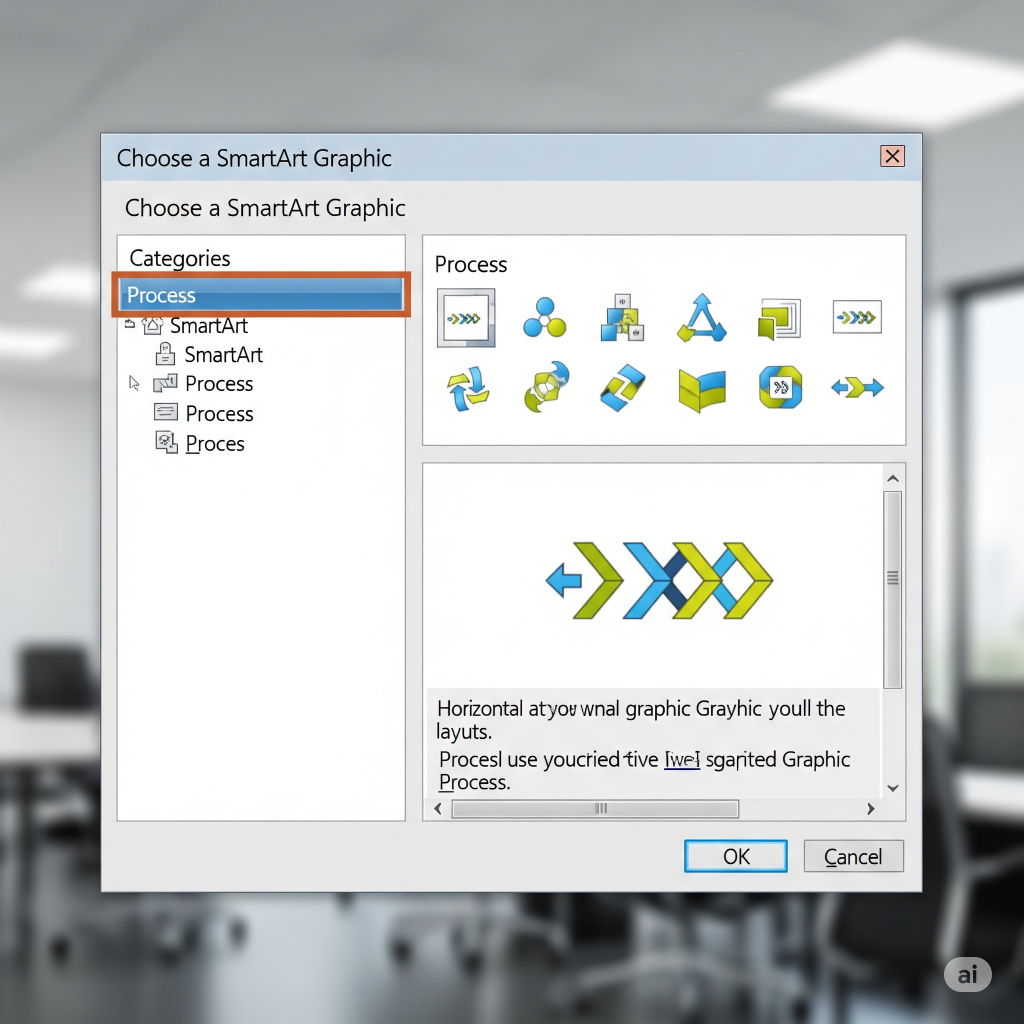
Select a Timeline Design: You’ll see several options. Look for designs explicitly labeled “Basic Timeline” or “Circle Accent Timeline.” However, don’t be afraid to explore other “process” layouts like “continuous block process” or “segmented process”—many can be adapted beautifully into a timeline!
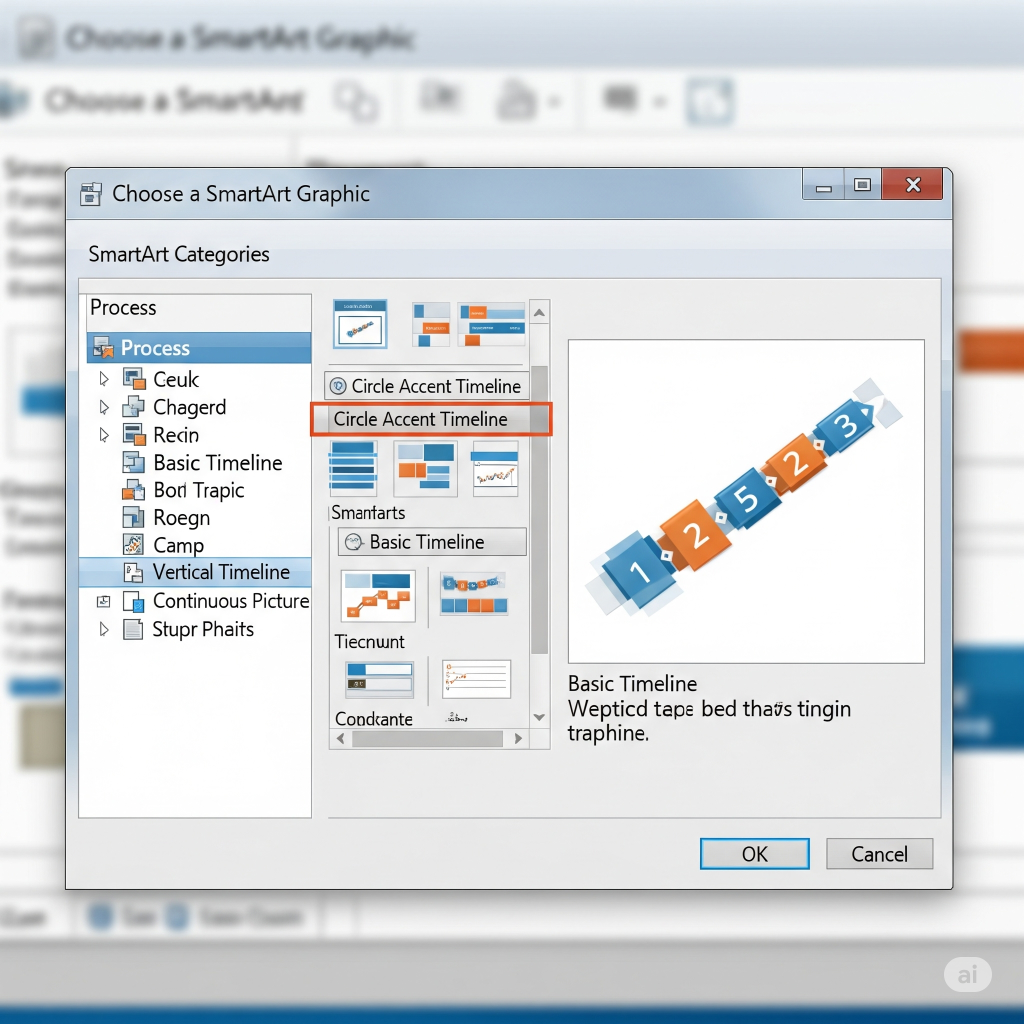
Click “OK”: Your chosen SmartArt graphic will appear on the slide.
Add Your Text: A “Type your text here” pane (or text placeholders directly on the graphic) will pop up. This is where you enter your dates and corresponding events.
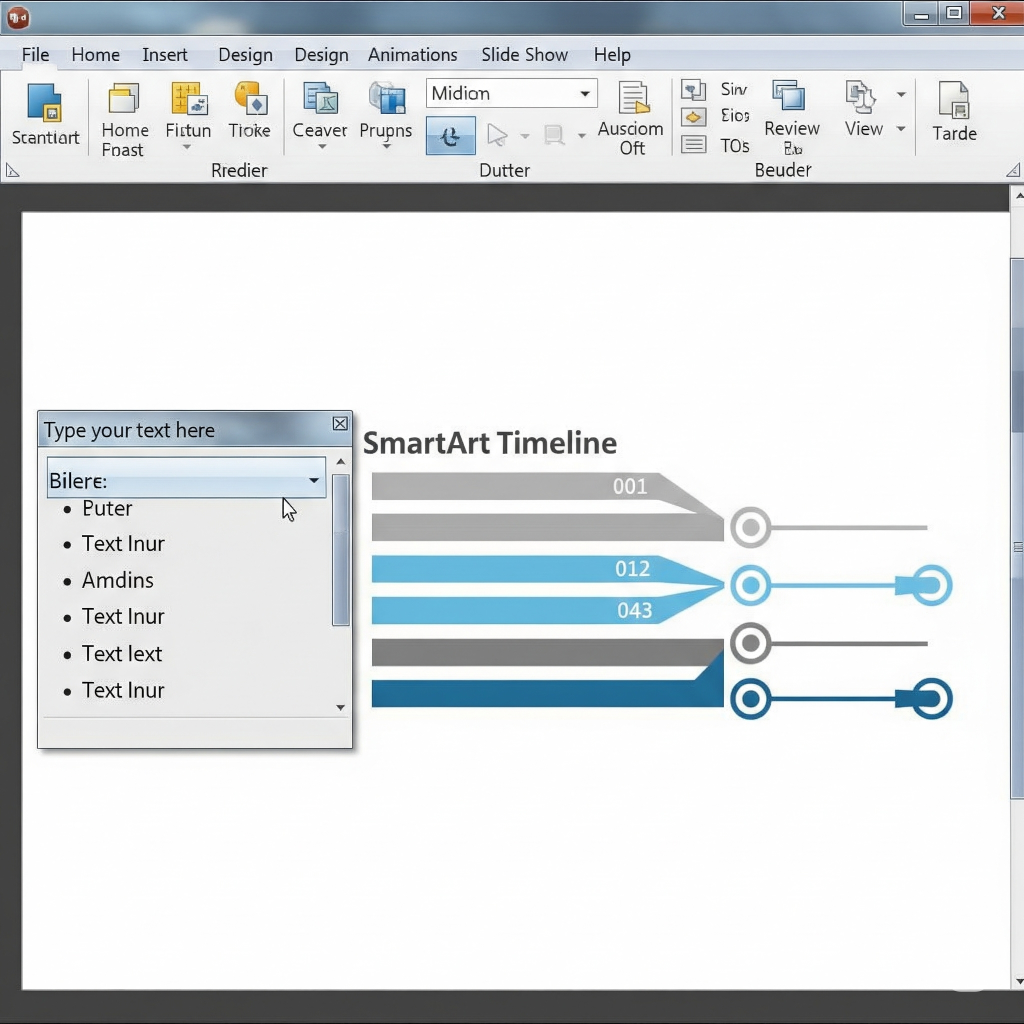
Tip: Press Enter to create a new point. Use the Tab key (or the “Demote” button in the SmartArt Design tab) to create sub-points or details under a main event.
Customize! Once your text is in, select the SmartArt graphic. The “SmartArt Design” and “Format” tabs will appear.
Change Colors: To select from a variety of pre-made color schemes, select “Change Colors” from the “SmartArt Design” tab.
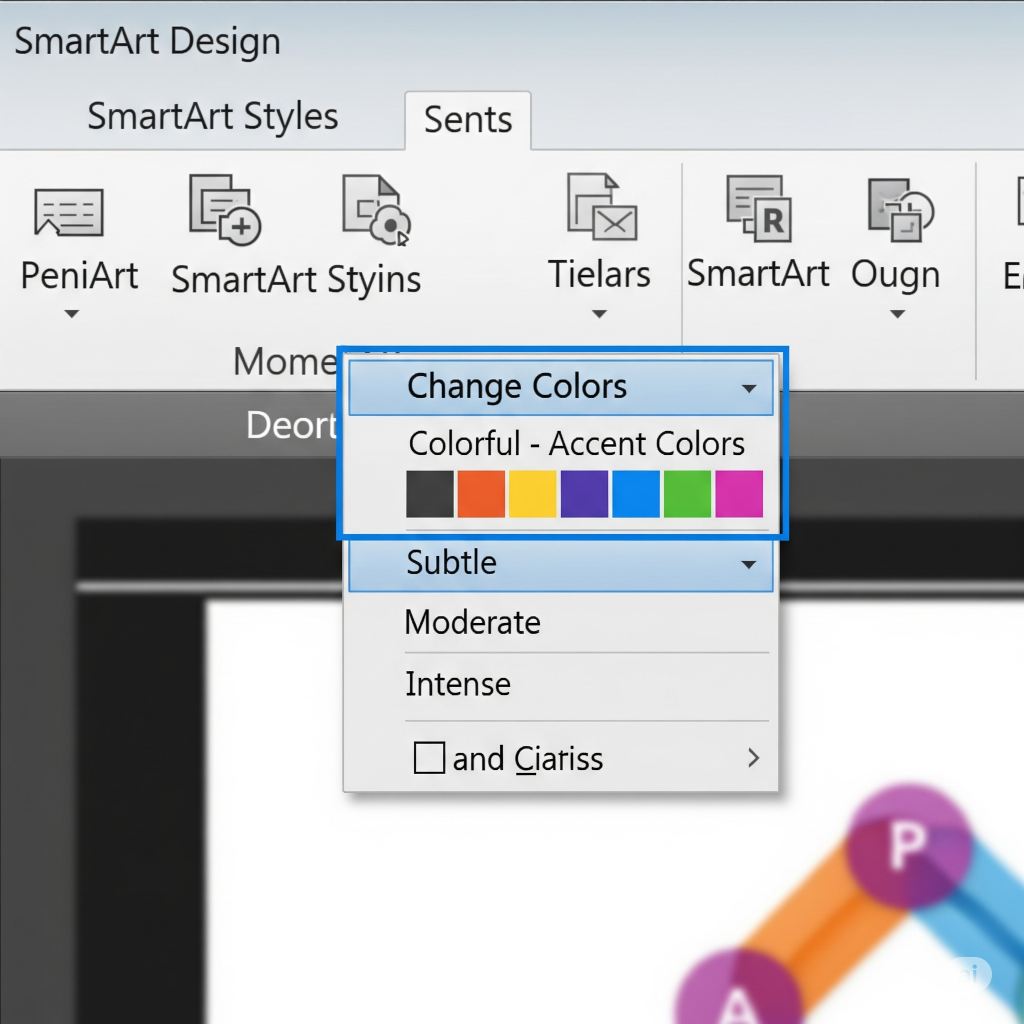
Change Styles: To create various looks, experiment with “SmartArt Styles” (3D, metallic, subtle, etc.).

Modify Layout: You can alter the current layout on the “SmartArt Design” tab without having to reenter your text if you don’t like it.
The Reasons Why SmartArt Is Excellent It takes care of the spacing and alignment for you, so adding or removing events is incredibly simple and won’t ruin the entire design. For a more unique and impactful design that goes beyond standard templates, consider a professional design from creativeone.cloud.
Method 2: Creating with Shapes (Creative & Custom Control)
Simple shapes give you the greatest creative freedom if you want your timeline to be genuinely original and not appear to be a template. This method offers a lot of creative opportunities, despite requiring a bit more work.
First, a blank slide should be used: Additionally, you may want to use a taller, portrait-oriented slide (Design > Slide Size > Custom Slide Size > Portrait) if your timeline is lengthy and vertical.
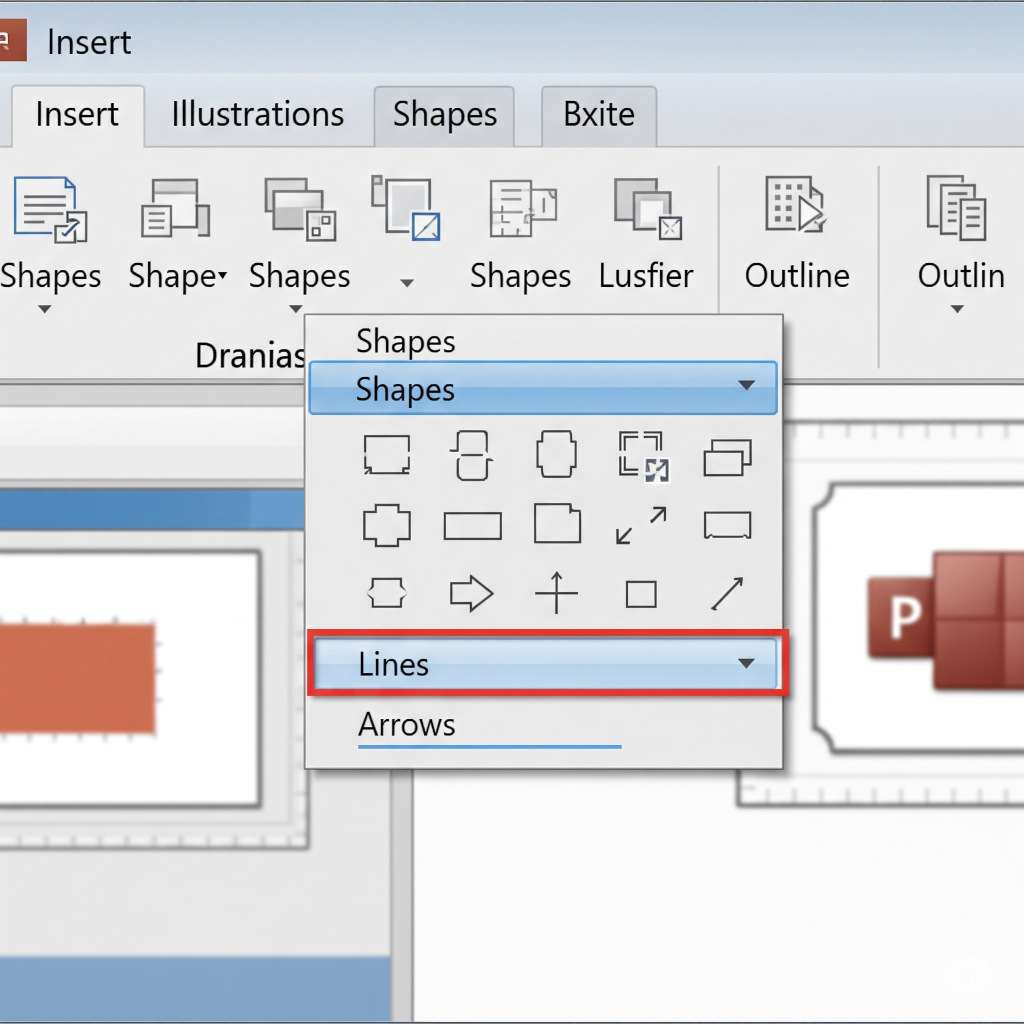
Make a “Timeline Line”: Select “Line” or “Arrow” from the Insert > Shapes menu. On your slide, draw a straight line across or down. To make sure it’s precisely vertical or horizontal, hold Shift while dragging.
Include Your “Events” or “Milestones”:
Go to Insert > Shapes again. To symbolize your events, use diamonds, rectangles, circles, or any other shape you like. Put them in line with your line.

Tip: To guarantee uniformity in size, duplicate shapes using Ctrl+D or Cmd+D.
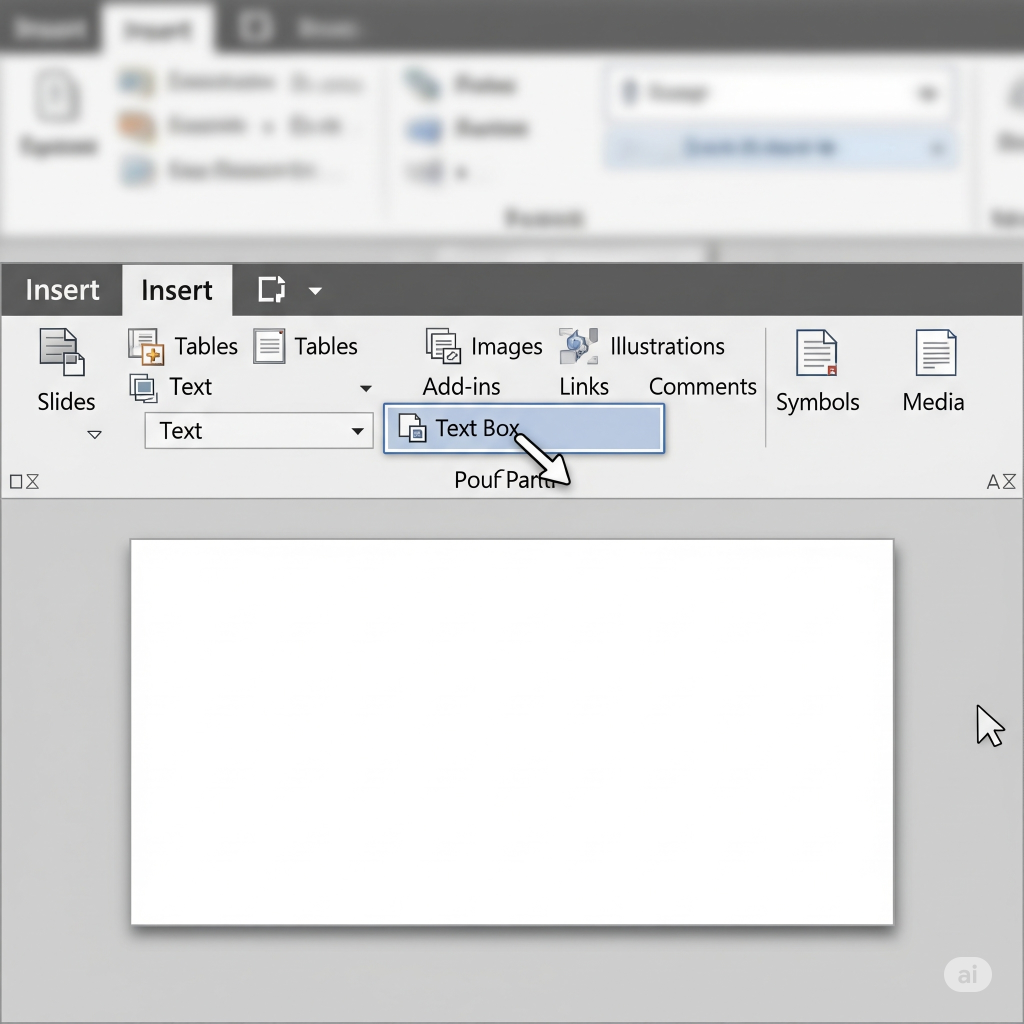
Add text boxes: Select Insert > Text Box for each milestone, then draw a box close to your shape. Type in your date and event description.
Connect & Refine:
Use smaller lines or connectors (Insert > Shapes > Lines) to link your text boxes to your timeline line or specific shapes.
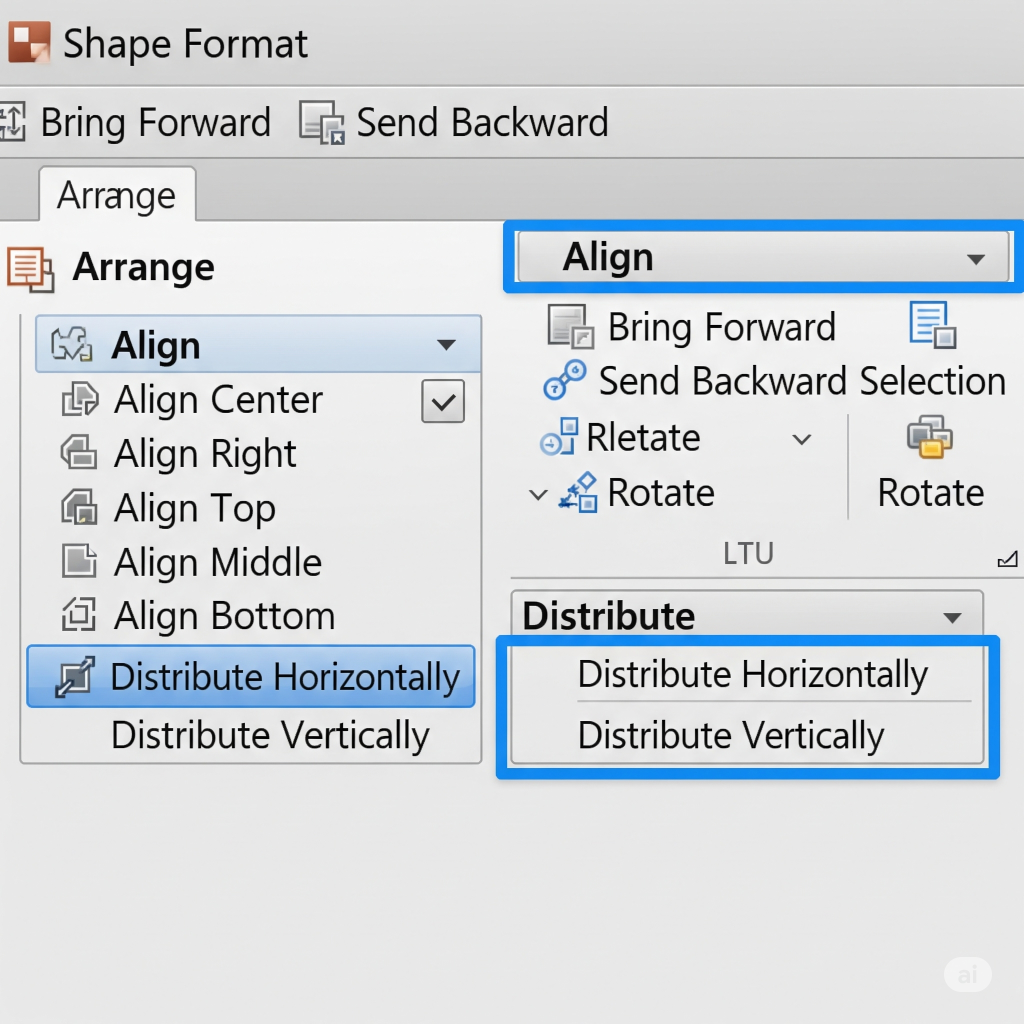
Distribute and Align: This is essential! Select all of your desired shapes and text boxes. Select “Align” from the “Shape Format” tab to guarantee exact alignment, either horizontally or vertically. Your friend is “Distribute Horizontally” or “Distribute Vertically” in this situation.
Components of the group: After selecting all the sections you are satisfied with (such as a milestone shape, date, and description), right-click > “Group” (or Ctrl+G / Cmd+G). This makes moving sections easier without sacrificing the design.
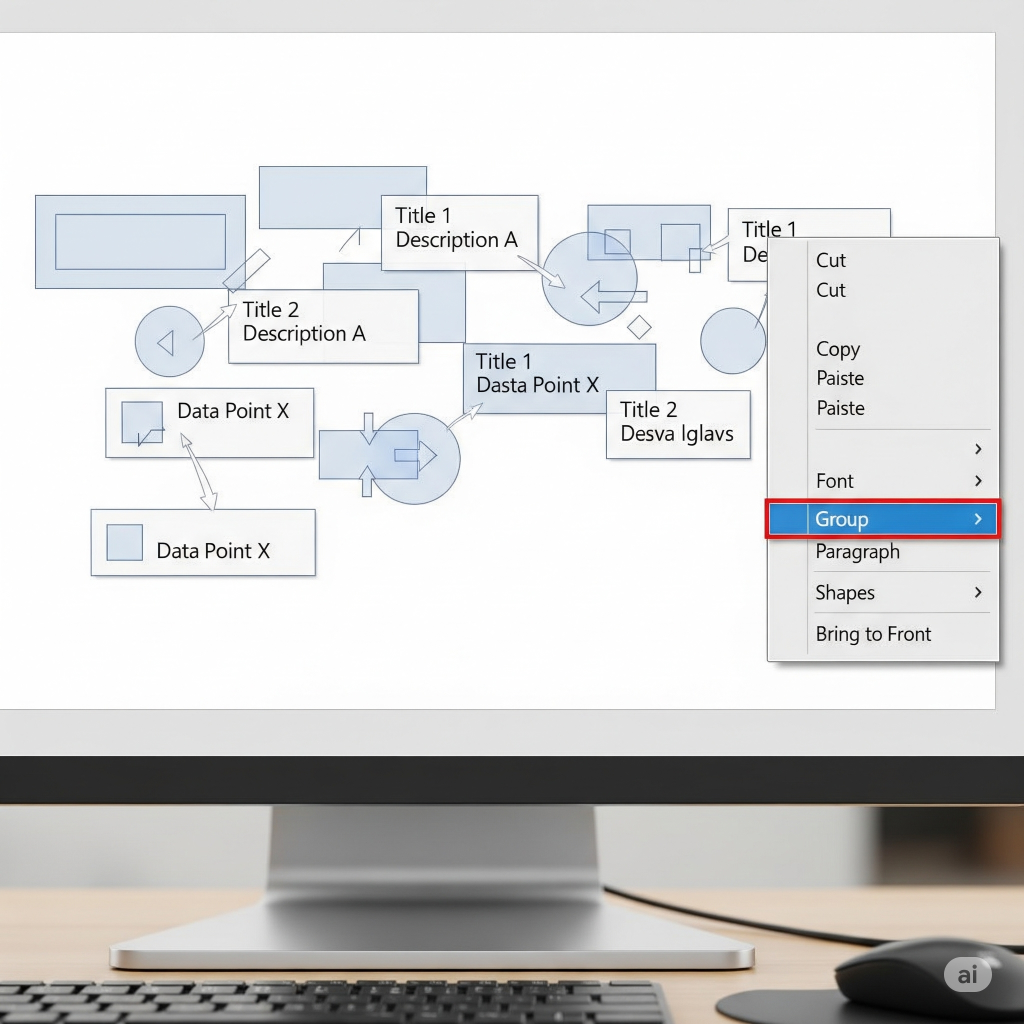
Color and Font: To alter the colors of fills, outlines, and text, select the “Shape Format” tab. Make sure your fonts and color scheme are consistent!
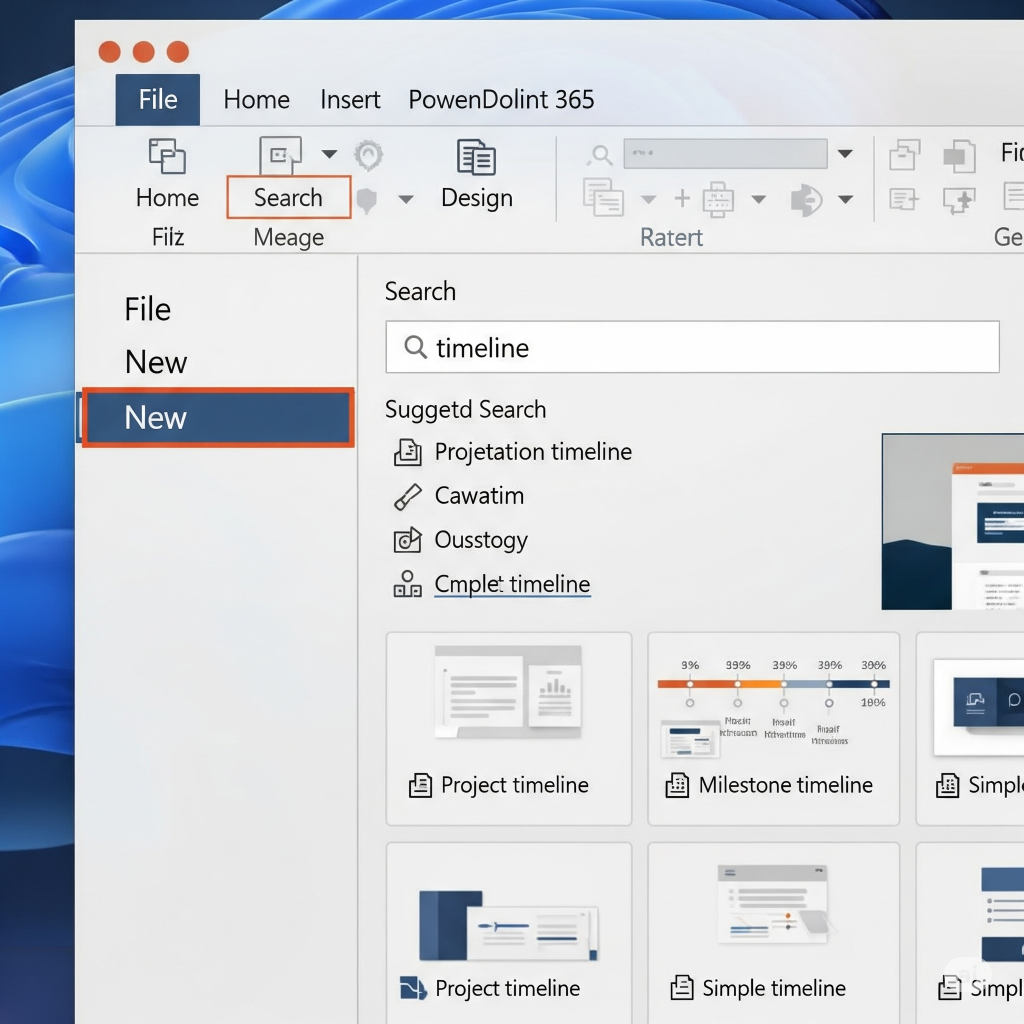
Method 3: Making Use of a Template (Quick & Expert Appearance)
Do you want to avoid starting from the beginning? PowerPoint offers built-in templates, and there are countless free and paid templates available online that can give your timeline a polished look instantly.
Search for Templates in PowerPoint:
Select “File” > “New.”
Type “timeline” into the search bar and hit Enter.
Look through the different timeline templates that Microsoft offers. After selecting one that satisfies your requirements for both style and content, click “Create.”
Downloads from Reputable Websites: Free PowerPoint timeline templates are available for download and customization from websites such as Slidesgo, PresentationGO, SlideModel, and even some specialized timeline tools (like Office Timeline). For unique, brand-aligned templates designed specifically for your needs, check out our work at creativeone.cloud.
Please Enter Your Information Here: When the template opens, simply enter your information in place of the dates and blank spaces. It is typically possible to alter the colors, typefaces, and even the elements that are added or removed.
Crucial Pointers for a Catchy Timeline:
Ensure a Clear Location: Refrain from clutter. Less is frequently more.
The hierarchy of appearance Use bolder colors, larger typefaces, or striking shapes to draw attention to significant dates or milestones.
Use the same color schemes, typefaces, and icon styles throughout your timeline to maintain your style coherence.
Describe a Story: Consider the progression. Does it logically lead the viewer’s eye from beginning to end?
Images & Icons: Mini-images or tiny, pertinent icons (Insert > Icons, or from outside sources) can give each event more visual appeal and context.
Check that the material is readable, particularly when giving a presentation.
You can use a pre-made template, the fully custom shape approach, or the quick SmartArt option in PowerPoint to quickly create an interesting timeline. Apply these techniques to see how your data can be turned into an interesting visual narrative!
