
You should set up your PowerPoint presentation to run automatically for a waiting area, kiosk, or simply to practice timing without clicking through. It’s an extremely useful instrument that can significantly increase the impact of your presentations, particularly if you can’t physically help them.
To prevent you from having to keep clicking, this helpful tutorial will show you how to set your PowerPoint slides to play automatically. Need professional assistance with your presentations? Explore our services at Creative One Cloud .
How to Make Your PowerPoint Play Automatically
This is perfect if you have a set amount of information on each slide, know exactly how long you want each slide to appear, or want to sync it with audio.
Select the “Transitions” tab: choose the first slide to begin your PowerPoint presentation.
Find “Advance Slide”: At first, it the found to the far right of the “Transitions” tab, the “Advance Slide” section is a part of the “Timing” group.
If you only want automatic advancement, make sure the “On Mouse Click” box is unchecked. If you want the option to click and proceed automatically, leave it checked.
Check “After” and “Set Time”: Press the “After” button. Then, before moving on to the next slide, indicate how many seconds you want that specific slide to display. You can use the up/down arrows or type the value.
Apply to Everyone (helpful but optional): After modifying the time for one slide, choose “Apply To All” if you want the timing on each after slide to be exactly the same. Use caution when doing this because it will replace any special timings you may have previously set for other slides.
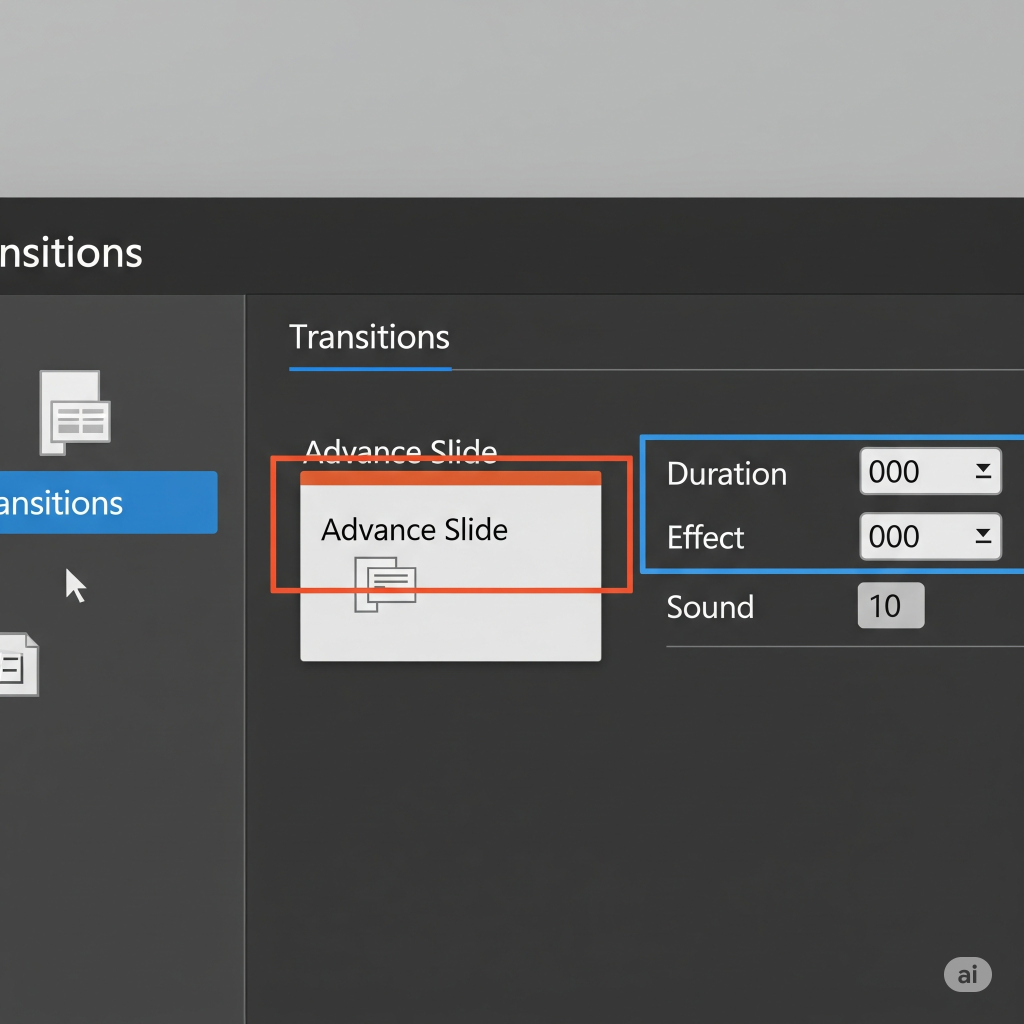
Repeat for Different Timings: You will need to pick each slide separately and repeat the “After” timing steps if each slide requires a different amount of time.
Step 2. Practice Timings (The “Practice Makes Perfect” Approach)
If you want to practice your PowerPoint presentation as though you were giving it in person and have PowerPoint track how much time you spend on each PowerPoint slide, this is great. It’s like a dry run that sets your timings for you!
Select the “Slide Show” tab: This is where practicing becomes magical.
Select “Rehearse Timings”: Locate and select “Rehearse Timings” from the “Set Up” group.
Get Your “Practice Run” Started: A tiny “Rehearsal” toolbar will show up in the upper-left corner of your presentation when it opens in full-screen slideshow mode. This toolbar has a timer for the current slide and a total presentation timer.
Navigate Your Slides: Just like in a live presentation, click to go at your own pace through your slides (and animations within slides). The timer will note the time you spend on each.
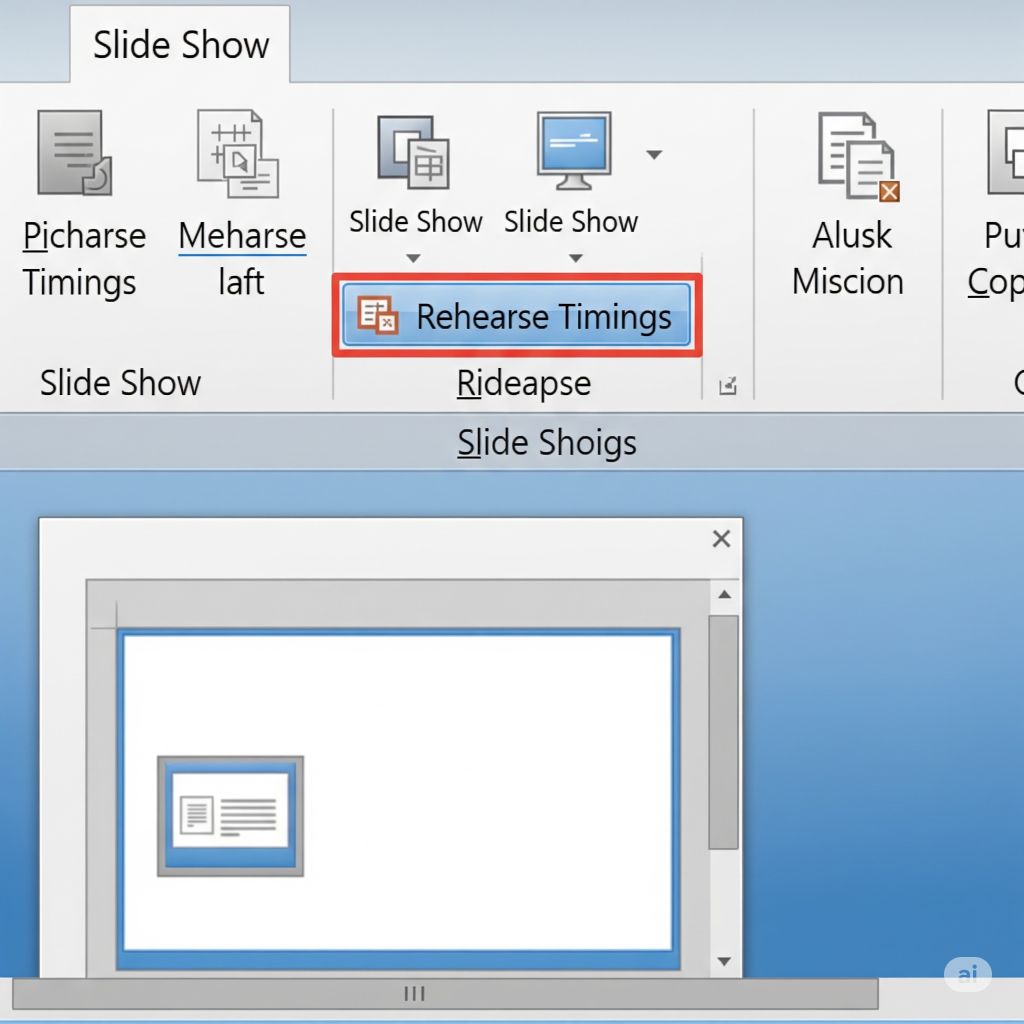
Retain Your Timings Secure: PowerPoint will ask you to save your updated slide timings when you click the Esc key or end your presentation. Press “Yes.”
Check Your Timings: Click “Slide Sorter” under the “View” tab to view the timings you’ve recorded. The duration is indicated beneath the thumbnail of each slide. Important Note for Recorded Timings: If you use “Rehearse Timings,” these recorded timings will generally override any “After” settings you manually put in the “Transitions” tab. Perfect your delivery with expert advice from Creative One Cloud .
Step 3. Setting Up for Kiosk or Continuous Loop (The “Always On” Method)
This is perfect for displays, trade show booths, or any other setting where you want the presentation to go on until someone physically ends it.
Choose the “Slide Show” tab: Again, this is your primary hub for playback settings.
Select “Set Up Slide Show”: Click this option in the “Set Up” group. A dialog box will show up.
Select the Type of Show You Want: There are several choices under “Show type,” including:
Presented by a speaker (Full Screen): This is the default, requiring manual clicks.
Browsed by an individual (Window): This runs in a window and still requires manual clicks to advance.
Browsed at a kiosk (Full Screen): This is the one you want for automatic, continuous playback! Select this.
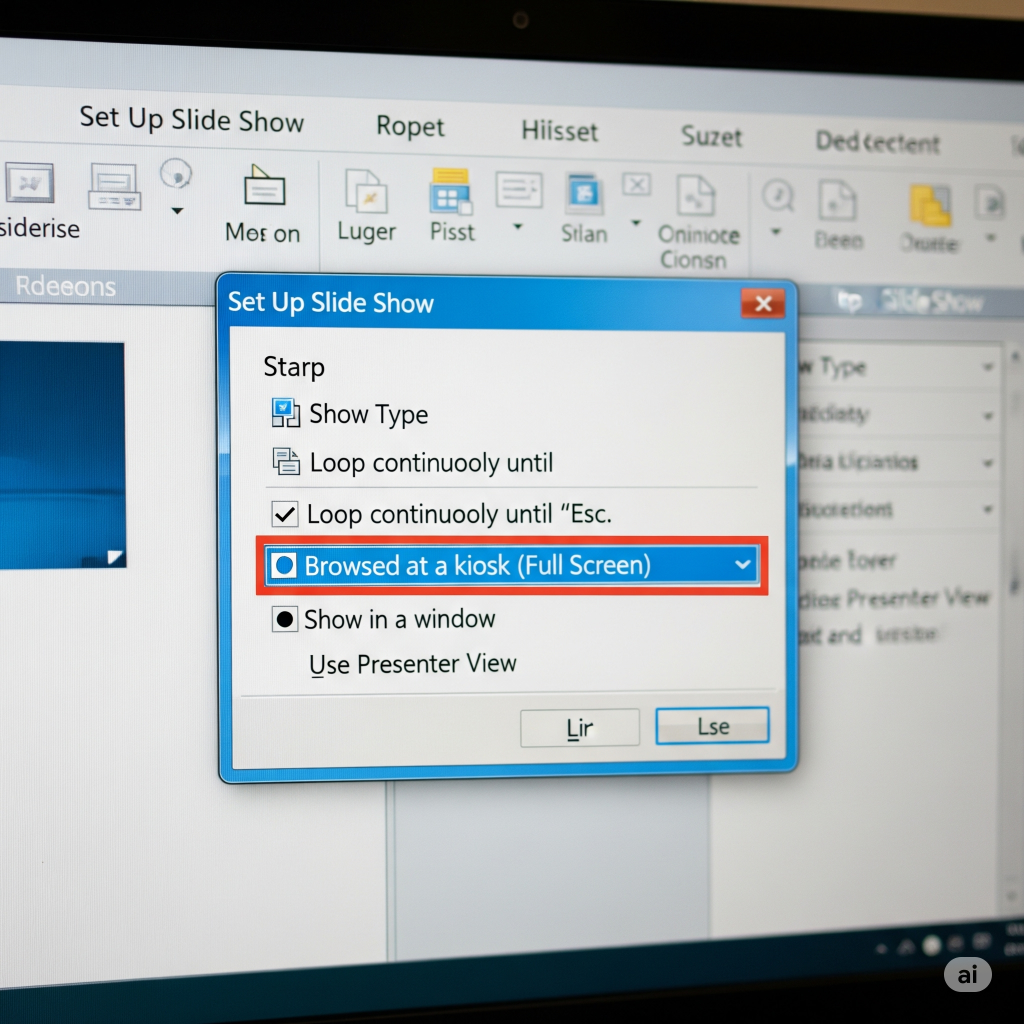
Make sure to check “Using Timings, if present”: Verify that “Using timings, if present” is chosen under “Advanced Slides.” This instructs PowerPoint to utilize the timings you specify (either through “Transitions” or “Rehearse Timings”).
Confirm “Loop continuously until ‘Esc’”: When you select “Browsed at a kiosk,” PowerPoint usually automatically checks the “Loop continuously until ‘Esc’” option under “Show options.” This ensures your presentation restarts from the beginning once it finishes.
Click “OK”: Save your settings.
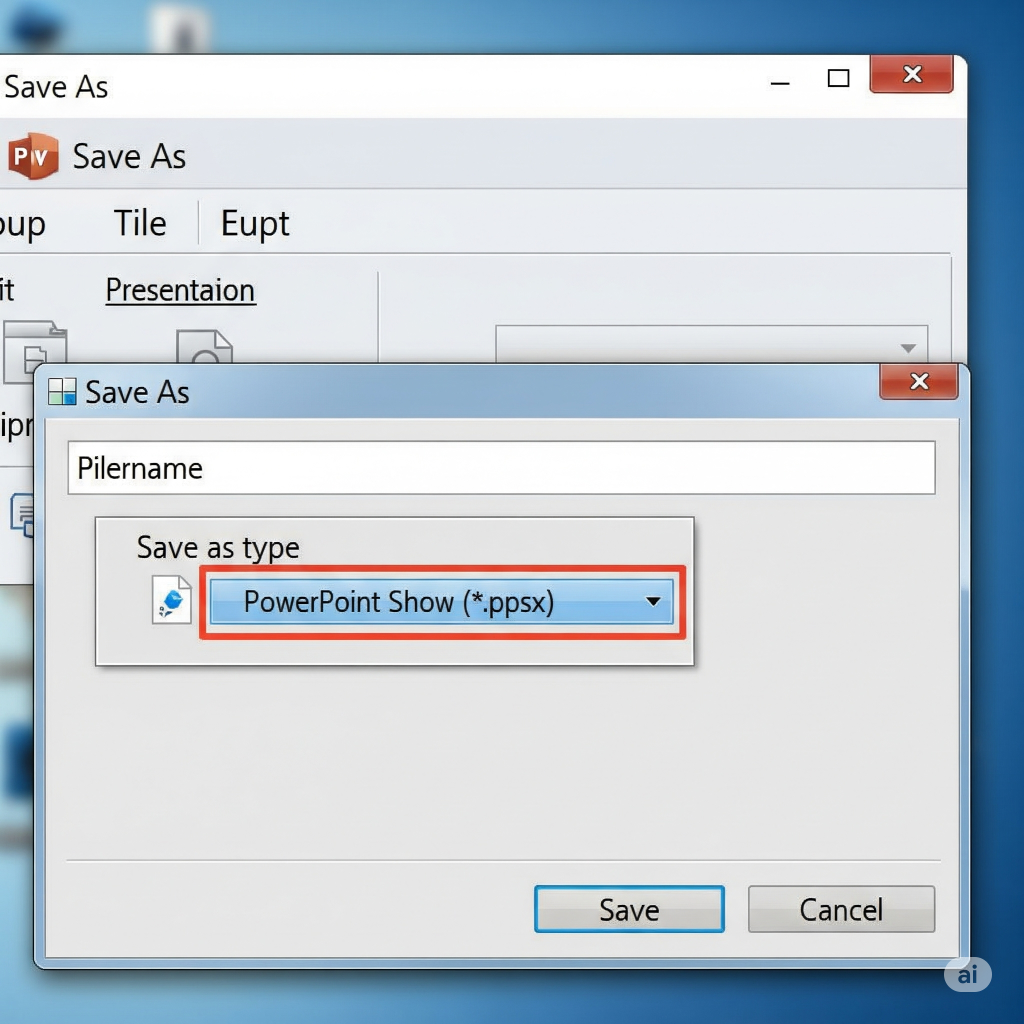
Step 4. Preserving as a PowerPoint (.ppsx) presentation
You can save your presentation in a unique format that, when viewed, initiates the slideshow after you modify the playback parameters and timings.
To modify the “Save as type,” select the drop-down menu next to “Save as type” in the “Save As” dialog box after selecting “File” > “Save As.”
Select “PowerPoint Show (*.ppsx)”: Select on this option.
Click “Save”: Now, when you double-click this (or anyone else does). ppsxfile, it will automatically go into slideshow mode with your personalized timings and looping settings!
Extra Tips for Automated Presentations:
The Value of Animations Remember that slide timings start as soon as the animations on each slide are finished. Consider in timing if your animations are intricate.
Video and Audio: If you want your video or audio to play automatically, make sure that “Start: Automatically” or “With Previous” is selected in the playback options found on the “Animations Pane” (for audio) or “Playback” tab (for video).
Keep testing! Make sure you review your automated presentation a few times before your big debut. It makes it easier to spot any awkward pauses, sudden shifts, or timing errors.
By following these guidelines, you can learn the way to design visually stunning PowerPoint presentations without constant supervision. Take pleasure in the design process!
Need Help Perfecting Your Automated Slideshows? Contact Us!
